
Grey Galaxy Upstand 3m Long, for 30mm and 40mm Grey Galaxy Worktops
This grey galaxy upstand 3m finishes the back edge of a Grey Galaxy worktop where it meets the wall. It is 3000mm long and, as the listing states, suitable for both 30mm and 40mm kitchen worktops, so it closes the gap behind the worktop in a colour that matches the surface.
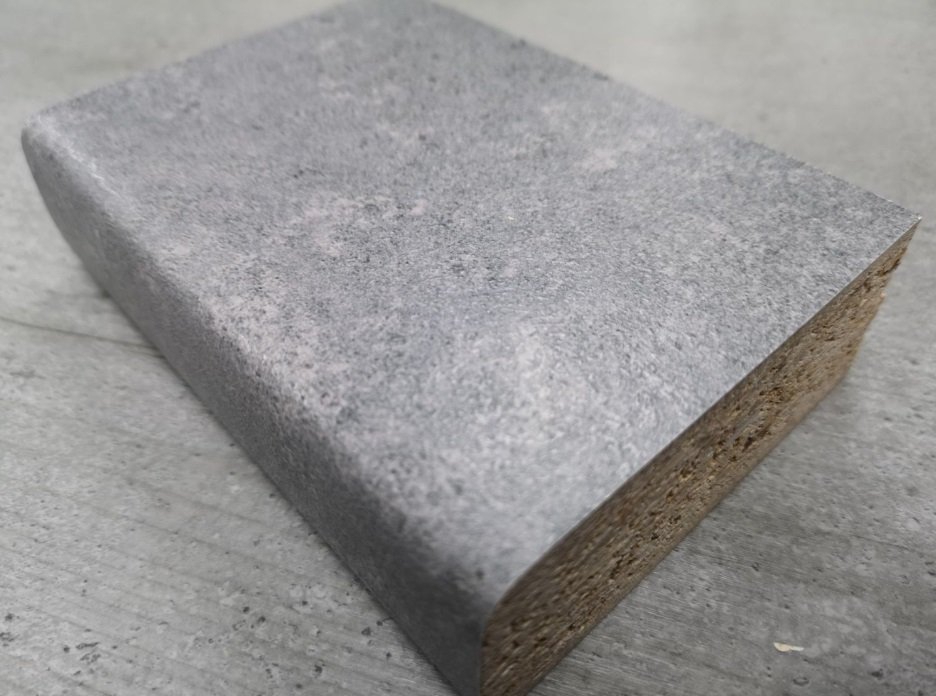
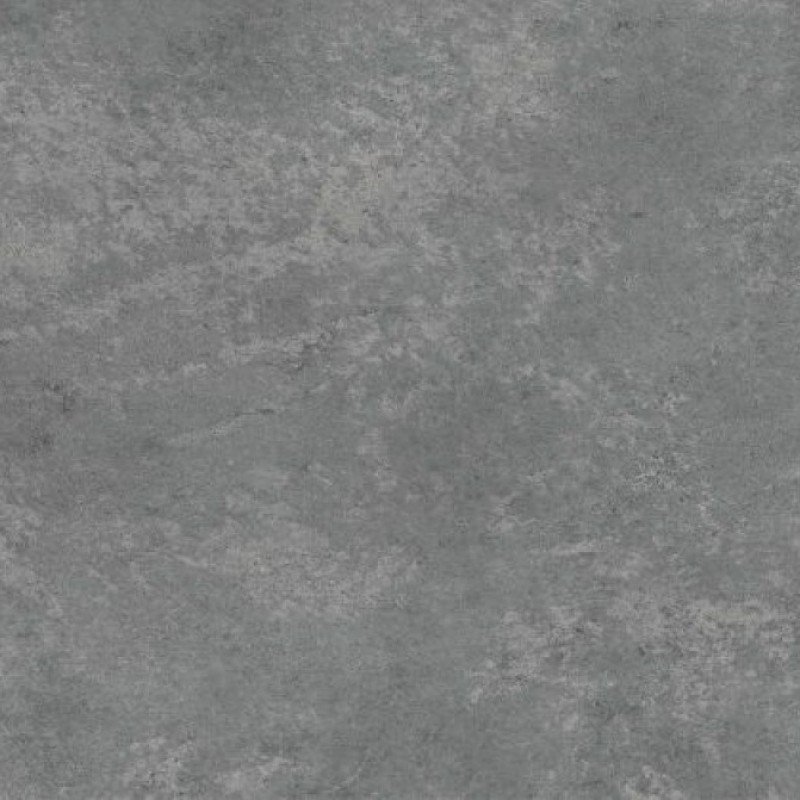
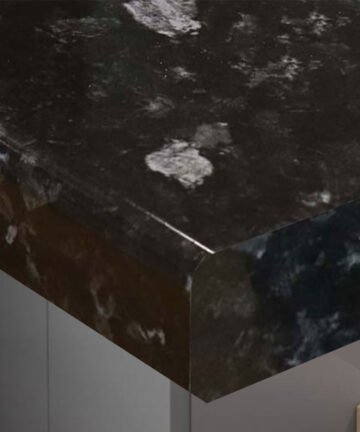
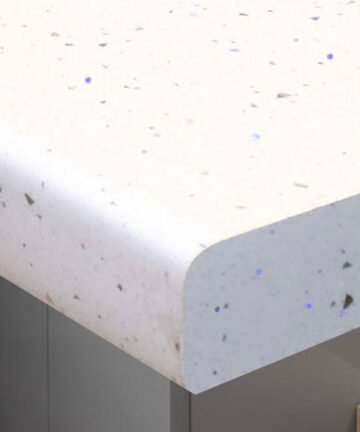
Upstands keep water, crumbs and spills from running down behind the units and give the kitchen a clean, finished line along the wall. The photos show the matching Grey Galaxy worktop edge and colour swatch.

Key features of the grey galaxy upstand 3m
- Colour: Grey Galaxy, to match the Grey Galaxy worktops
- Length: 3m (3000mm)
- Suits: 30mm and 40mm kitchen worktops
- Use: along the back edge of worktops where they meet the wall
- Other length: also available in 1.5m
- Quantity: 1 length

What an upstand does
An upstand runs along the back of the worktop where it meets the wall. It closes the gap that every wall has, stops water, crumbs and spills running down behind the units, and gives the kitchen a neat, finished line. The grey galaxy upstand 3m does that job in the same Grey Galaxy colour as the worktop, so the surface looks as though it simply turns up the wall.
The Grey Galaxy colour
Grey Galaxy has the look of polished concrete or grey stone, a mid-grey surface with soft, cloudy variations in tone. It gives an industrial, contemporary feel and pairs well with white, black, navy and wood-effect units, matt black taps and handles, and pendant lighting.
The photos show the Grey Galaxy worktop edge and the colour swatch, so you can see exactly the finish the grey galaxy upstand 3m is made to match.
Choosing a 3m length
At 3 metres (3000mm), the grey galaxy upstand 3m covers a long run of wall in one piece, with no joint along the way. It suits long straight runs and L-shaped kitchens, and it can be cut into shorter pieces for the walls either side of a cooker or window. Choose the 1.5m length for short runs.
For 30mm and 40mm worktops
The listing states that the grey galaxy upstand 3m is suitable for both 30mm and 40mm kitchen worktops, so it works with either thickness in the Grey Galaxy range. Keep the same worktop thickness throughout a kitchen, and the upstand line will stay level from one run to the next.
Measuring for upstands
Measure every length of wall where the worktop meets it, from corner to corner or from the wall to the end of the worktop. Add the lengths together, add a little extra for cutting, and decide where each piece will start and finish. Plan joints in corners where they are least noticeable, and you will know how many lengths of grey galaxy upstand 3m to order.
Cutting to length
Mark the cut with a pencil on masking tape, and cut with a fine-toothed saw from the decorative face so the edge stays clean. Support the offcut so it does not snap away at the end of the cut. Dry-fit each piece of grey galaxy upstand 3m against the wall before fixing, and trim a little at a time until it fits.
Internal and external corners
Where two walls meet in an internal corner, the two pieces of upstand can be butted together or mitred at 45 degrees for a neat joint. External corners, around a chimney breast or the end of a run, look best mitred. Cut slowly and check the angle on an offcut first, so the corner of the grey galaxy upstand 3m closes neatly.
Fixing to the wall
Upstands are usually fixed to the wall with a suitable panel adhesive or grab adhesive, following the adhesive maker’s instructions, and pressed down firmly onto the worktop while the adhesive sets. The wall should be clean, dry and sound. Hold each piece of grey galaxy upstand 3m in place with masking tape until the adhesive has gripped.
Sealing the joint with the worktop
Run a thin bead of clear or matching silicone along the line where the upstand meets the worktop, and smooth it with a wet finger or a profiling tool. This seal is what stops water getting behind the upstand. Seal the ends and any joints between lengths of grey galaxy upstand 3m in the same way.
Behind the hob
Most hob makers ask for a non-combustible splashback, such as glass, steel or tiles, on the wall behind the hob, and for a gap around the hob itself. Stop the upstand either side of the splashback, and follow the hob maker’s instructions for clearances. Using the grey galaxy upstand 3m along the rest of the wall gives a neat finish right up to the splashback.
Around the sink and window
The wall behind the sink gets the most water, so take extra care with the silicone there. Under a window, fit the upstand along the back of the worktop and seal the top edge where condensation from the window may run down. The grey galaxy upstand 3m keeps that busy area of the kitchen tidy and easy to wipe.
Upstand, splashback or tiles?
Tiles look traditional but need grout that discolours, and a full splashback covers a large area of wall. An upstand is the quickest, simplest way to finish the back of a worktop, and it can be combined with tiles, paint or a glass splashback above. A matching grey galaxy upstand 3m is the low-maintenance choice.
Cleaning and care
Wipe the upstand with a soft cloth and warm, mildly soapy water, then dry it. Avoid scouring pads, abrasive creams and harsh solvents, which can dull the surface. Check the silicone along the bottom edge every few months and replace any that has lifted, so the grey galaxy upstand 3m keeps protecting the wall.
Matching edging strips
For a complete finish, cover exposed worktop ends with an edging strip in the same colour. Browse our edging strips to go with the grey galaxy upstand 3m, so every visible edge of the worktop is colour-matched.
Matching worktops
The upstand is made to go with the Grey Galaxy worktops and breakfast bars. Browse our worktops to see the full range, and order the grey galaxy upstand 3m with the worktops so everything arrives together.
How many lengths to order
Add up the total wall length, divide by the length of each upstand, and round up. Allow for cuts at corners and around the sink, cooker and window, as offcuts are not always long enough to reuse. Order all lengths of grey galaxy upstand 3m at the same time so the colour matches from piece to piece.
Tools for the job
You will need a tape measure, a pencil and masking tape, a fine-toothed saw or mitre saw, a sanding block, panel adhesive and a caulking gun, clear or matching silicone, and a cloth. A mitre box helps with neat corner cuts. With these ready, fitting a run of grey galaxy upstand 3m is a straightforward job.
Avoiding common mistakes
The usual problems are cutting from the wrong face and chipping the edge, fitting onto a dusty or damp wall, and skipping the silicone along the bottom. Clean the wall and worktop first, dry-fit every piece, and seal every joint, and the grey galaxy upstand 3m will look good and stay firmly in place.
Sockets and switches
Where a socket or switch sits low on the wall, mark its position on the upstand and cut a neat notch or hole with a fine saw or hole saw. Turn off the power at the consumer unit before loosening the faceplate. The faceplate can then sit over the grey galaxy upstand 3m, hiding the cut edges.
Uneven walls
Very few walls are perfectly straight. Small gaps between the wall and the back of the upstand are filled by the adhesive, and a thin bead of silicone along the top edge hides any small gap there. On badly bowed walls, scribe the back edge of the grey galaxy upstand 3m to the wall before fixing.
A quick kitchen update
If the worktops are staying but the wall behind them looks tired, new upstands and fresh paint above them make a big difference in an afternoon. A matching grey galaxy upstand 3m with new handles or a new tap can make an older kitchen look cared for again.
Why the back edge matters
The joint between a worktop and the wall is one of the weakest points in a kitchen. Walls are rarely perfectly straight, so there is almost always a small gap, and every time water splashes from the sink or a pan boils over, some of it heads for that gap. Over time, water that gets behind the units can stain the wall, lift paint and swell the back edge of the worktop. A well-sealed upstand closes that gap for good.
Planning the layout
Before cutting anything, lay the lengths along the worktop against the wall and decide where each will start and finish. Aim to put any joint in a corner, behind a kettle or toaster spot, or at the end of a run rather than in the middle of a long, empty stretch where the eye will notice it. Mark each piece in pencil on masking tape with where it goes, so the cutting order is clear.
Getting a clean cut
A sharp, fine-toothed blade is the key to a chip-free edge. Lay masking tape along the cut line, mark on the tape, and cut slowly from the decorative face. If you use a power saw, check which way the teeth cut and turn the piece over if needed so the teeth enter the decorative face. Lightly sand the cut edge afterwards with a fine sanding block, working towards the back.
Ends that stop mid-wall
Where an upstand stops part-way along a wall, beside a tall unit, a splashback or the end of a worktop, the cut end is on show. Sand it smooth and square, and finish it with a neat bead of matching or clear silicone, or with an end cap where one suits the profile. Keep the end in line with the end of the worktop for a tidy look.
Silicone tips
For a neat silicone line, run masking tape along the worktop and the upstand, leaving a narrow gap at the joint. Apply a steady bead, smooth it with a profiling tool or a wet finger dipped in soapy water, and peel the tape off straight away while the silicone is still wet. Leave it to cure for the time on the tube before wiping the worktop or using the sink.
Keeping the wall dry
Before fitting, make sure the wall is dry and free from mould. If there has been a leak behind the units, fix it first and let the wall dry out completely. Treat any mould with a suitable cleaner, and let the wall dry before applying adhesive. Upstands protect a sound wall; they cannot cure a damp one.
Paint, tiles or glass above
Above the upstand, the wall can be finished in whatever suits the kitchen. A wipeable kitchen paint is the simplest choice; tiles or a glass splashback suit the areas behind the sink and hob. Choose colours that work with the worktop: soft greys, whites and creams are easy to live with, while a bolder colour above a plain worktop adds character.
Replacing old upstands
To replace old upstands, cut through the old silicone with a sharp knife, then ease the upstand away from the wall with a wide scraper, working along its length. Scrape off old adhesive and silicone from the worktop and the wall, clean with a suitable remover, and let everything dry before fitting the new lengths. Take care not to scratch the worktop.
Looking after the seal
Silicone does not last forever, especially around a busy sink. Check the bottom edge of the upstands every few months; if the silicone has lifted, cracked or turned black, cut it out and apply a fresh bead. It takes a few minutes and keeps water out from behind the units.
Fitting order
Fit the worktops first and seal all their cut edges, then fit the sink and hob, and only then fit the upstands. That way the upstands sit down on the finished worktop surface, and the silicone line along the bottom covers the joint neatly. Leave the splashback behind the hob until the upstands either side are in place, so you can line the two up.
Working round pipes and boxing
Where a pipe, boxing or a wall corner gets in the way, make a cardboard template of the shape first, check it fits, then transfer it to the upstand. Cut a little inside the line and file or sand up to it, checking the fit as you go. A careful notch looks far neater than a gap filled with silicone.
Lighting along the wall
Under-cabinet lights shine straight down onto the upstand and the worktop, so a clean, unbroken upstand line looks especially smart at night. Fit the lights after the upstands so any cables run tidily above them, and choose a warm or neutral white light that shows the true colour of the surface.
Matching the whole kitchen
When the worktops, breakfast bar, upstands and edging strips all come from the same colour range, the kitchen looks planned from end to end. Lay the pieces out together before fitting to check they sit well side by side, and fit them in the same direction so any pattern runs the same way. Small details like this are what make a fitted kitchen look professionally finished.
Keep a short offcut of the grey galaxy upstand 3m in a drawer. It is useful for checking colours when you choose paint, tiles or accessories later, and for testing a cleaning product on a hidden piece before using it on the kitchen.
Before you start
Check you have everything before you begin: all the lengths, adhesive, silicone, masking tape, a sharp saw and a clean cloth. Empty the worktop, clear the wall, and turn off the power if you will be working near sockets. Give yourself enough time to fit one wall at a time without rushing, so each piece lines up with the last.
Utility rooms and other spaces
Upstands are just as useful in a utility room, laundry area or boot room, wherever a worktop meets a wall. Use the grey galaxy upstand 3m there to protect the wall behind the washing machine or a sink, and to tie the room in with the kitchen colours.
At a glance
- Grey Galaxy Upstand 3m
- 3000mm long
- 30mm and 40mm worktops
- Matches Grey Galaxy worktops
- Cut to length
- Seal with silicone
Grey Galaxy Upstand 3m questions
How long is it? 3m (3000mm).
Which worktops does it suit? Both 30mm and 40mm kitchen worktops, as the listing states.
Does it match the worktop? Yes. It is made to match the Grey Galaxy worktops.
Can I cut it? Yes. Cut it with a fine-toothed saw from the decorative face.
How do I fix it? With a suitable panel adhesive, then seal along the bottom edge with silicone.
Can it go behind the hob? Follow the hob maker’s instructions; most ask for a non-combustible splashback behind the hob.
How do I clean the grey galaxy upstand 3m? Wipe with a soft cloth and warm, mildly soapy water, then dry. Avoid abrasive cleaners.
Looking for more like this upstand? Browse the full Upstands collection or the rest of the Kitchen Worktops shop. To learn more, see this overview of kitchen splashbacks.


There are no reviews yet.