

Grey Pearl Wall Panel 250mm x 8mm x 2700mm x 8mm
This grey pearl wall panel 250mm x 8mm is a 250mm x 2700mm x 8mm panel with the look of a soft blue-grey. One panel covers 0.68 square metres, so a bathroom wall goes up quickly with very few joints and no grout.
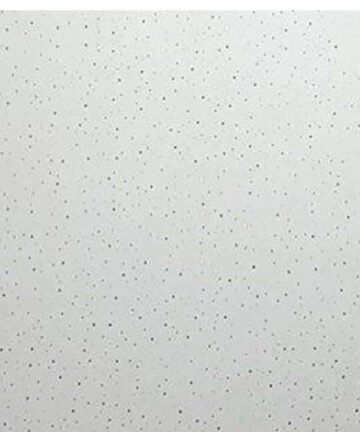
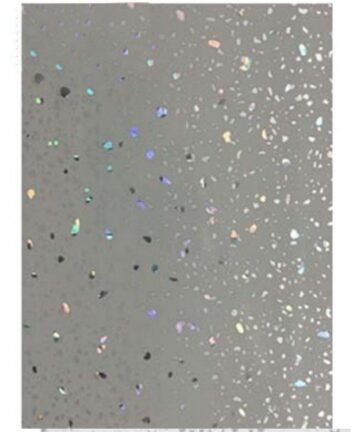
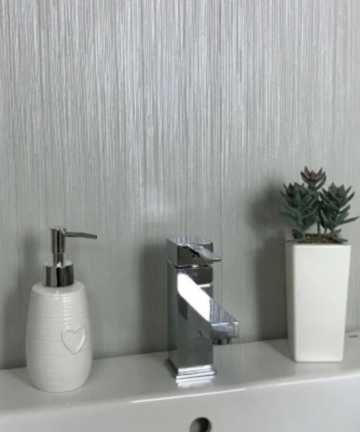
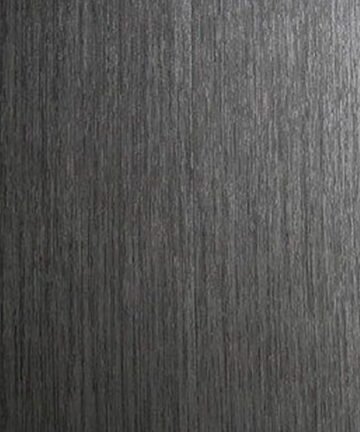
The listing states that the panels are waterproof. The photo shows the panel pattern close up.

Key features of the grey pearl wall panel 250mm x 8mm
- Size: 250mm x 2700mm x 8mm
- Coverage: 0.68 square metres per panel
- Look: a soft blue-grey
- Water: waterproof, as the listing states
- Use: bathrooms, showers, en suites, cloakrooms
The Grey Pearl look
The grey pearl wall panel 250mm x 8mm has the look of a soft blue-grey. The photo shows the panel pattern close up.
It suits bathrooms, en suites, shower areas and cloakrooms, and pairs well with white sanitaryware and chrome, black or brushed steel taps and showers. Hold the colour against your floor and furniture in daylight before you decide.
Panel size and coverage
Each panel measures 250mm wide, 2700mm high and 8mm thick, so one grey pearl wall panel 250mm x 8mm covers 0.68 square metres of wall. The 2700mm height covers most bathroom walls from floor or bath to ceiling in one piece, with no horizontal joint.
How many panels do I need?
Measure the width of each wall and divide by the panel width, 250mm, then round up. A 2 metre wall needs 8 panels, for example, and a 3 metre wall needs 12. Add one extra panel for cuts around windows and doors, and order every grey pearl wall panel 250mm x 8mm at the same time so the colour matches.
Joining the panels
Panels are joined edge to edge along the wall, using the joint system or trims that suit your panels, and sealed with silicone in wet areas. Start in a corner, check the first panel is upright with a spirit level, and work across the wall so each grey pearl wall panel 250mm x 8mm lines up with the last.
Waterproof walls
The listing states that the panels are waterproof, which is why they are used around showers and baths. The panel surface does not let water through, so the joints, corners and edges are what need care: seal them with a sanitary silicone, and the grey pearl wall panel 250mm x 8mm keeps water off the wall behind.
No grout to clean
Tiled walls have grout lines that collect soap scum, discolour and grow mould. A panelled wall has far fewer joints and no grout at all, so cleaning is a quick wipe. With a grey pearl wall panel 250mm x 8mm there is nothing to scrub or regrout, which is a big reason people switch from tiles.
Choosing a panel adhesive
Large wall panels are usually fixed with a panel adhesive applied in beads or dabs to the back of the panel, following the adhesive maker’s instructions for spacing and for the wall type. Choose an adhesive made for wall panels in bathrooms, and check it suits the surface behind, whether plaster, plasterboard, tiles or timber battens. Press each grey pearl wall panel 250mm x 8mm firmly to the wall, check it is upright, and support it while the adhesive grabs.
Shower enclosures
Panels are a popular way to line a shower enclosure or walk-in shower, because they go up quickly and leave few joints for water to find. Fit the panels before the shower tray seal, or follow the tray maker’s advice, and run a continuous bead of silicone where the grey pearl wall panel 250mm x 8mm meets the tray.
Around the bath
Above a bath, the panels run from the rim of the bath up to the ceiling. Fit the bath first, fill it with water before sealing so it settles to its working position, then seal along the bath edge. The grey pearl wall panel 250mm x 8mm gives a smooth, easy-clean wall around the bath with no tiles to crack.
Preparing the wall
The wall must be sound, dry and reasonably flat. Remove loose paint or wallpaper, fix any leaks and let damp walls dry out fully. Check the wall with a long straight edge: small dips are fine, but where the wall is badly uneven, fix timber battens first and fit the grey pearl wall panel 250mm x 8mm to the battens.
Fitting over old tiles
Panels can often be fitted over existing tiles, as long as the tiles are firmly fixed, clean and flat, which saves the mess and time of stripping the wall. Check every tile is sound, clean off soap and grease, and follow the adhesive maker’s instructions for fixing to tiles.
Cutting panels
Measure carefully and mark the cut on the face of the panel. Cut with a fine-toothed saw or the tool your panel supplier recommends, supporting the panel on both sides so it does not flex. Cut each grey pearl wall panel 250mm x 8mm slightly oversize where it meets a corner, and trim to fit.
Cutting round pipes and fittings
Mark the centre of each pipe, socket or valve on the panel, then cut the hole with a hole saw a little larger than the pipe. Seal around every pipe with silicone once the panel is in place. Make a cardboard template for awkward shapes before cutting the grey pearl wall panel 250mm x 8mm.
Corners and edges
Internal corners, external corners and the edges at the ceiling and floor are finished with trims, or with a neat bead of silicone where panels butt together. Choose the method that suits your panels and keep it consistent around the room, so every grey pearl wall panel 250mm x 8mm edge looks the same.
Sealing with silicone
For a neat silicone line, mask both sides of the joint with tape, apply a steady bead of sanitary silicone, smooth it, and peel the tape off while the silicone is wet. Leave it to cure for the time on the tube before using the shower or bath.
Cleaning and care
Wipe the panels with a soft cloth and warm water with a little mild detergent, then dry with a clean cloth for a streak-free finish. Avoid scouring pads, abrasive creams and harsh solvents, which can dull the surface. A squeegee after each shower keeps the grey pearl wall panel 250mm x 8mm looking its best.
Ventilation and condensation
Good ventilation keeps any bathroom healthier. Run the extractor fan during and after a shower, and open a window when you can. Panels are easy to wipe dry, but steam that has nowhere to go will settle on mirrors, ceilings and fittings.
Panels or tiles?
Tiling a wall means adhesive, spacers, grout and a lot of cutting, and grout needs regular cleaning. Panels cover the same wall in far fewer pieces, often in a day, with no grout. For many bathrooms a grey pearl wall panel 250mm x 8mm is the quicker, simpler and lower-maintenance choice.
Small bathrooms
In a small bathroom, panels with few joints make the walls look calm and uncluttered. Lighter colours keep a small room bright, while darker colours on one feature wall add depth without closing the room in. Good lighting brings out the pattern of the grey pearl wall panel 250mm x 8mm.
Feature walls
A single panelled wall behind a bath, basin or bed makes a strong feature without redecorating the whole room. Choose the wall people see first when they walk in, and keep the other walls in a quiet colour that picks up a tone from the grey pearl wall panel 250mm x 8mm.
Cloakrooms, utility rooms and kitchens
Panels are not only for bathrooms. They give a wipe-clean wall in a cloakroom, utility room or laundry area, and can be used as a splashback away from direct heat. Keep panels well clear of hobs, cookers and other direct heat sources, and follow the hob maker’s advice for the wall behind it.
Lighting and mirrors
Bathroom lighting changes how a wall looks. Bright, cool light shows marble and stone patterns crisply, while warmer light softens them. A large mirror opposite the panelled wall doubles the effect, and LED strips at the ceiling or in a niche make the grey pearl wall panel 250mm x 8mm glow at night.
Tools you will need
A tape measure, spirit level, pencil and masking tape, a fine-toothed saw, a hole saw for pipes, a caulking gun, panel adhesive and sanitary silicone, trims if you are using them, and a clean cloth will cover most jobs. Have everything ready before starting, so the grey pearl wall panel 250mm x 8mm can be fitted in one session.
Common mistakes
Most problems come from rushing: fitting onto a damp or dusty wall, not checking the first panel is upright, forgetting to seal a joint or the bath edge, or cutting from the wrong face. Take your time with the first panel, and the rest follow neatly.
Storing panels before fitting
Keep panels flat and dry, indoors at room temperature, for a day or so before fitting, so they settle to the room. Leave any protective film on until each grey pearl wall panel 250mm x 8mm is fitted, to keep the surface free of scratches and dust.
Planning the order
List every wall to be panelled with its width and height, count the panels for each, and add trims, adhesive and silicone. Order everything at once so all panels come from the same batch. Browse our wet wall panels for other colours and sizes, and our full panel range for kits.
Safety when cutting
Wear eye protection when cutting and drilling, and a dust mask in a small room. Turn off the water and electricity before working around pipes, sockets or switches, and clamp panels firmly so they cannot slip while you cut.
Rented homes and quick refreshes
For landlords and anyone short on time, panels turn a tired, tiled bathroom into a clean, modern room in a day or two, often without stripping the old tiles. There is no grout to discolour between tenancies, and the walls wipe clean quickly between lets. Choose a neutral colour that suits most furniture and fittings, and keep a spare panel in case of future damage.
En suites and wet rooms
In an en suite, where space is tight and the shower is used every day, large panels with few joints are easy to keep clean and look smart. In a wet room, the panels line the walls while the floor is waterproofed and tiled or finished separately; follow the wet room system maker’s instructions for where the wall and floor meet, and seal that joint carefully.
Choosing a colour
Think about the size of the room, the light it gets and the fittings that will stay. White and light stone looks keep a small or dark bathroom bright; marble patterns add a touch of luxury; dark colours look dramatic in a larger room or on a single feature wall. Bring a photo of your floor and vanity unit when comparing colours, and look at them in daylight as well as under the bathroom light.
Matching panels in one room
Use the same panel on every wall of a shower enclosure for a seamless look, or pair a patterned panel on the shower wall with a plainer panel elsewhere. Keep the panel height consistent around the room, and run trims or silicone lines at the same level so the joints look planned. Ordering all panels for one room together keeps the colour consistent.
Budget and time
Compared with tiling, panels save on adhesive, grout, spacers and the hours spent cutting and grouting small tiles. A typical shower enclosure can be panelled in a day, and the room can usually be used again once the silicone has cured. Factor in trims, adhesive and silicone when you price the job, along with any battens for uneven walls.
Removing old panels
If you are replacing old panels, cut through the silicone along every joint and edge first, then ease the panels away from the wall, working from one end. Scrape off old adhesive and silicone, let the wall dry fully, and check it is flat and sound before fitting the new panels. Take care around pipes and fittings, and turn the water off if you need to move them.
Fixing accessories
Towel rails, shelves, shower riser rails and grab rails can be fixed through the panels into the wall behind. Mark the positions, drill slowly through the panel with a sharp bit, and use fixings that suit the wall behind, not the panel. Put a dab of silicone in each hole before inserting the plug or screw, to keep water out.
Joints at the ceiling and floor
At the ceiling, leave a small gap and finish with a trim or a neat bead of silicone so the panels can move slightly with temperature changes. At the floor, keep the panel just above the floor level and seal the gap, so water on the floor cannot wick up behind. A neat, consistent line at the top and bottom makes the whole wall look professionally finished.
Looking after the seals
Silicone is the part of a panelled wall that needs looking after. Check the seals around the shower tray, bath and corners every few months. If the silicone has lifted, cracked or turned black, cut it out and apply a fresh bead; it only takes a few minutes and keeps water out from behind the panels.
Bathroom fittings that go well
Panels look their best with fittings in a matching finish throughout the room. Chrome suits bright, white and marble panels; matt black gives a crisp contrast on light colours and a sleek look on dark ones; brushed brass warms up cream, stone and marble effects. Pick one metal finish for taps, shower, towel rail and handles, and the grey pearl wall panel 250mm x 8mm becomes the backdrop that ties the room together.
Checking the delivery
When the panels arrive, unpack them on a clean, flat surface and check each one for damage before you start cutting, as it is much easier to sort out a problem before fitting. Check the colour is the same on every panel by standing them side by side in daylight, and keep the packaging until the job is finished so a spare grey pearl wall panel 250mm x 8mm can be stored safely.
Before you start
Read the adhesive and silicone instructions, check the room temperature they ask for, and clear the room. Protect the bath or shower tray with a dust sheet, and plan where every panel and joint will go before applying any adhesive.
At a glance
- Grey Pearl Wall Panel 250mm x 8mm
- 250mm x 2700mm x 8mm
- 0.68 m2 per panel
- Waterproof
- No grout lines
- For bathrooms and showers
Grey Pearl Wall Panel 250mm x 8mm questions
What size is each panel? 250mm wide, 2700mm high and 8mm thick.
How much does one panel cover? 0.68 square metres.
Is it waterproof? Yes, the listing states that the panels are waterproof. Seal joints and edges with sanitary silicone.
How do the panels join? Edge to edge with the joint system or trims that suit your panels, sealed with silicone in wet areas.
Can I fit them over tiles? Often yes, if the tiles are sound, clean and flat; follow the adhesive maker’s instructions.
Can I cut them? Yes. Mark on the face and cut with a fine-toothed saw, supporting the panel on both sides.
How do I clean the grey pearl wall panel 250mm x 8mm? Wipe with a soft cloth and warm, mildly soapy water, then dry. Avoid abrasive cleaners.
Looking for more like these panels? Browse the full Wet-wall Panels collection or the rest of the Kitchen Worktops shop. To learn more, see this overview of bathrooms.

There are no reviews yet.