
Stone Oak Edging Strip 1.2m for 30mm and 40mm Worktops
This stone oak edging strip 1.2m covers the cut end of a Stone Oak kitchen worktop, so the end of the run is finished in the same colour as the surface. It is 1.2 metres (1200mm) long and made for 30mm or 40mm worktops, as its title says.
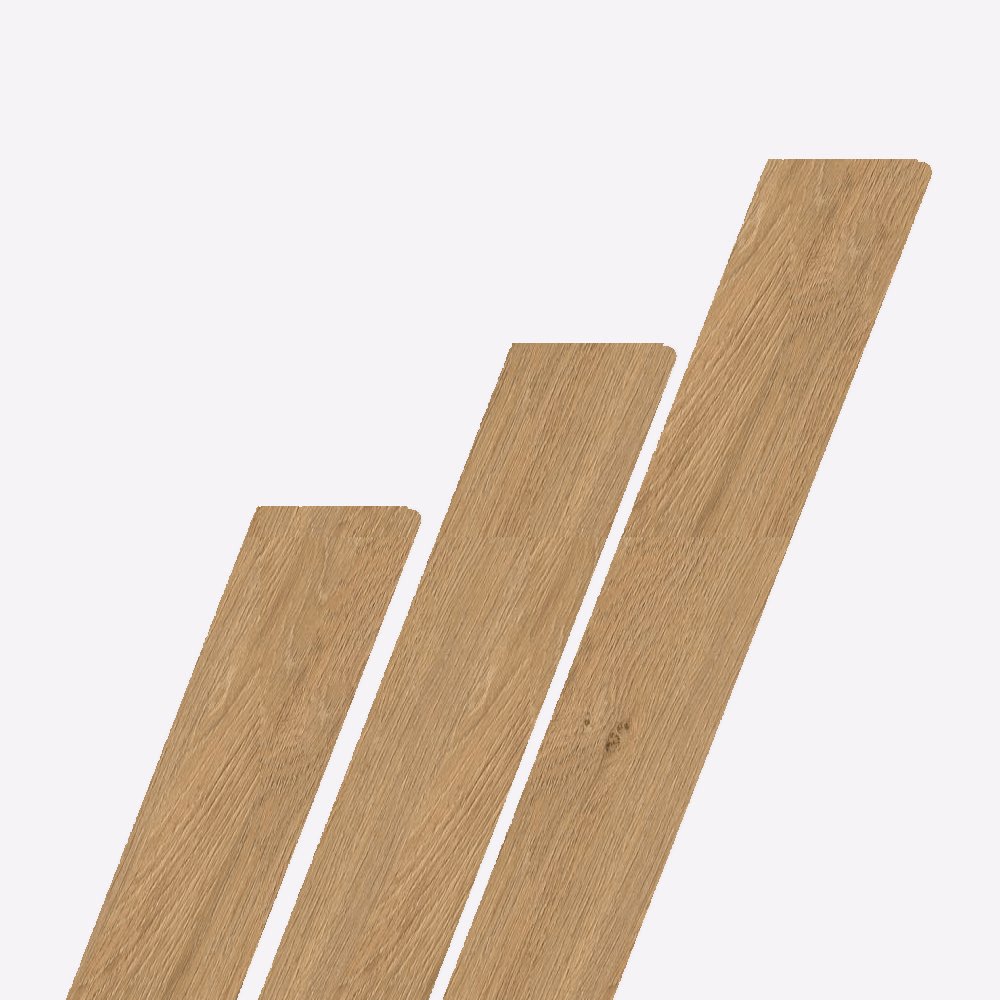
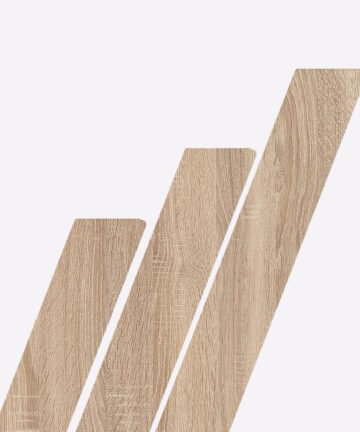
The listing describes it as designed for easy DIY fitting, protecting the worktop edge from knocks, moisture and wear, and suitable for laminate and wood worktops. The photo shows three Stone Oak strips side by side.

Key features of the stone oak edging strip 1.2m
- Colour: Stone Oak, warm golden oak wood effect
- Length: 1.2m (1200mm)
- Suits: 30mm and 40mm kitchen worktops
- Use: covering exposed, cut worktop ends
- Worktops: laminate and wood, as the listing states
- Quantity: 1 strip
What an edging strip does
When a worktop is cut to length, the cut end shows the raw core of the board. An edging strip covers that end with a strip in the worktop colour, so the end of the run looks as finished as the front edge. The stone oak edging strip 1.2m does exactly that for Stone Oak worktops, and it also helps protect the cut end from knocks and moisture, as the listing says.
The Stone Oak colour
Stone Oak has the look of warm, golden oak with a soft, straight grain. It is a bright, natural wood tone that suits white, cream, grey and sage kitchens, in modern and country styles alike.
The photo shows three Stone Oak strips side by side.
1.2m long, for 30mm and 40mm worktops
Each strip is 1.2 metres (1200mm) long and, as its title says, made for 30mm or 40mm kitchen worktops. One strip covers both ends of a standard 600mm deep worktop with length to spare, or the end of a deeper breakfast bar. Trim the stone oak edging strip 1.2m to width and length for a neat fit on either thickness.
Where edging strips are needed
Edging strips are used wherever the end of a worktop is on show: at the end of a run beside a door, next to a tall fridge or oven housing that is set back, at the end of a breakfast bar or peninsula, and on any worktop that is cut short in the middle of a room. Count every visible end before ordering, and order a stone oak edging strip 1.2m for each.
Preparing the worktop end
Cut the worktop end straight and square with a fine-toothed blade, then sand it lightly so it is flat and free of dust and loose chips. The end must be clean and dry. Seal the cut end first if your worktop maker recommends it, and let the sealant dry before fitting the stone oak edging strip 1.2m.
Fitting the strip
Follow the fitting instructions that come with the strip and the adhesive you use. In general, cut the strip a little longer and wider than the worktop end, fix it in place, press it firmly along its whole length, and leave it to bond before trimming. The listing describes the stone oak edging strip 1.2m as designed for easy DIY fitting.
Trimming flush
Once the strip has bonded, trim the overhang flush with the top and front of the worktop. Use a fine file, a sanding block or an edge trimmer, always working towards the worktop so you do not lift the strip. Finish with a light sanding of the edges so the stone oak edging strip 1.2m sits smoothly against the worktop surface.
Rounded and square fronts
Where the worktop has a rounded front edge, the strip needs shaping at the front corner to follow the curve. Mark the curve on the back of the strip using the worktop as a template, trim it close with a sharp knife or fine saw, and finish with a file. Take your time here; a neat corner makes the stone oak edging strip 1.2m look factory-fitted.
Protecting against water
A cut worktop end is vulnerable to water, especially near a sink, kettle or dishwasher. Sealing the end and covering it with an edging strip keeps moisture away from the core. Wipe up spills promptly around the ends, and check the stone oak edging strip 1.2m occasionally near the sink to make sure it is still tight.
Matching the worktop
The strip is made in the Stone Oak decor, to finish worktops in the same decor. Hold the stone oak edging strip 1.2m against your worktop in daylight before fitting to check the match, and browse our worktops if you are choosing a new worktop and strips together.
Matching upstands
Finish the back edge of the worktop with a matching upstand where the range has one, and the whole worktop is colour-matched on every visible edge. Browse our upstands to complete the look alongside the stone oak edging strip 1.2m.
Tools you will need
A tape measure, pencil, fine-toothed saw, sanding block and fine file, a sharp knife, the adhesive you have chosen, a clean cloth and some masking tape will cover most jobs. A small roller or a block of wood wrapped in cloth helps press the stone oak edging strip 1.2m down evenly while it bonds.
Common mistakes
The most common problems are fitting onto a dusty or damp end, not pressing the strip down along its whole length, and trimming before the adhesive has bonded. Clean the end, press firmly, wait, and trim towards the worktop, and the stone oak edging strip 1.2m will stay in place for years.
Cleaning and care
Wipe the strip with a soft cloth and warm, mildly soapy water, then dry it. The listing says it is easy to clean and maintain. Avoid scouring pads and harsh solvents, which can dull the surface or weaken the bond, and keep hot pans and appliances away from the stone oak edging strip 1.2m at the end of the worktop.
Breakfast bars and islands
Breakfast bars, peninsulas and islands often have two or more visible ends, and they are the ends people see first when they walk into the kitchen. A colour-matched stone oak edging strip 1.2m on each end makes a bar or island look like a solid piece, rather than a cut board.
How many strips to order
Count each visible worktop end and allow one strip per end, or one strip for two ends on standard 600mm deep worktops if you are confident with the cutting. Order one spare: it is useful if a cut goes wrong, and for matching colours later. Order every stone oak edging strip 1.2m at the same time so the colour is consistent.
Repairing a damaged end
If an existing worktop end has been chipped or has swollen slightly from water, cut back to sound material if you can, sand it flat, seal it, and fit a new strip. A fresh stone oak edging strip 1.2m can make a tired worktop end look new again without replacing the whole worktop.
Worktop joints and ends
Edging strips are for exposed ends, not for joints between two worktops. Where two worktops meet, use a joint strip, a mitre joint or worktop bolts, and seal the joint. Keep the stone oak edging strip 1.2m for the ends where the cut face would otherwise show.
Laminate and wood worktops
The listing states that the strip suits various worktop materials, including laminate and wood. Whatever the worktop, the end must be clean, flat and dry for a good bond, and the adhesive must suit both the strip and the worktop. Test on an offcut first if you are unsure.
A quick kitchen fix
Worn or missing end strips make a kitchen look tired. Replacing them takes very little time and money, and it is one of the simplest ways to smarten up an older kitchen. A new stone oak edging strip 1.2m on each end, a fresh silicone line along the back and clean cupboard doors make a big difference.
Utility rooms and other spaces
Worktops in utility rooms, laundry areas, home offices and garages have exposed ends too. The same strip finishes them neatly and protects the cut ends from knocks and damp, so use a stone oak edging strip 1.2m wherever a worktop end is on show.
Getting a neat finish
The difference between a home job and a professional one is usually in the edges. Cut accurately, keep the strip slightly oversize, press it down firmly and trim with care, finishing with a light sanding. Run a finger along the trimmed edge: it should feel smooth, with no ridge where the strip meets the worktop.
Fitting order
Fit the worktops first, cut and seal the ends, then fit the edging strips before the upstands and sink. That way the strips are trimmed flush with the worktop before anything else sits against them. Leave the strips to bond fully before you load the worktop or wipe it with water.
Safety when cutting
Wear eye protection when cutting and sanding, and a dust mask in a confined space. Clamp the worktop or strip firmly before cutting so it cannot move, keep fingers well away from blades, and unplug power tools before changing blades or clearing offcuts.
Keeping the colour consistent
Edging strips, worktops and upstands are made to match, but colours can vary slightly between batches. Keep all the pieces for one kitchen together, and lay the strip against the worktop before fitting to check it matches in your lighting. If a strip will sit next to a sunny window, check it in daylight too.
Measuring the worktop end
Measure the depth of the worktop from the back edge to the front, and its thickness, at the exact end you will cover. Worktops are not always perfectly square after cutting, so measure at both the top and the bottom of the end. Cut the strip a few millimetres longer and wider than your measurements, and the overhang can be trimmed back to a perfect fit once the strip has bonded.
Write the measurements on a piece of masking tape stuck to each stone oak edging strip 1.2m, so it goes on the end it was cut for.
Choosing an adhesive
The listing does not say how the strip is fixed, so choose an adhesive that suits both the strip and the worktop, and read its instructions before you start. Contact adhesives are applied to both surfaces and left to go tacky before pressing together; other adhesives need clamping while they set. Whatever you use, apply it evenly to the whole surface so there are no dry spots that could lift later.
End panels and tall units
Where a worktop finishes against a tall unit, an end panel or a wall, the end may be hidden and need no strip. Where it stops short, leaving a gap, or where a tall unit is set back from the worktop front, the end shows and needs covering. Stand where people will see the kitchen from, at the door and at the table, and check which worktop ends are really on view before you order.
Corners and curves
Edging strips are made for straight ends. On a curved or angled worktop end, the strip can be bent gently round a large curve if it is flexible enough, but tight curves and sharp corners need separate pieces cut and joined neatly. Cut the joins at a slight angle, and keep the join line where it is least noticeable, such as at the back of the worktop.
Edges near the hob and oven
Heat can soften some adhesives and mark worktop surfaces. Avoid finishing a worktop with an exposed end right beside a hob or oven where possible, and leave the gaps the appliance makers recommend. If an end does sit near a heat source, check the strip from time to time and re-fix it if the bond has loosened.
Edges near the sink and dishwasher
The area round the sink and dishwasher is the wettest part of the kitchen. If a worktop end sits close to them, seal the cut end thoroughly before fitting the strip, press the strip down well along its full length, and run a thin line of clear silicone along the bottom edge if the end is near the floor where water could collect.
Older kitchens
Many older kitchens have worktop ends that were never finished, or where the original strips have lifted or broken away. Peel off any loose old strip, scrape off the old adhesive, sand the end flat and clean, and fit a new stone oak edging strip 1.2m. It is one of the quickest jobs in a kitchen refresh, and the result is noticeable straight away.
Storing strips before fitting
Keep edging strips flat, dry and at room temperature until you fit them. Strips stored in a cold garage or van can be stiff and less willing to bond, so bring them indoors a day before fitting. Keep them in their packaging until needed, so the decorative face is not scratched.
When to call a fitter
Fitting an edging strip is a small job that most people can do with care. If your worktops are being fitted by a kitchen fitter, ask them to fit the strips at the same time, as they will have the trimming tools to hand. For a single end on an existing worktop, a careful DIY fit is usually all it needs.
Checking the finished edge
When the strip is trimmed, look along the worktop from the end and from the front. The stone oak edging strip 1.2m should sit flush with the top surface, with no lip to catch a cloth, and the front corner should follow the shape of the worktop edge. Run a damp cloth over it to check nothing catches, then leave it to settle before heavy use.
Small details, big difference
Kitchens are judged on their details. Neat silicone lines, doors that line up, handles that match and finished worktop ends all add up to a kitchen that looks well made. An exposed, raw worktop end is one of the first things people notice, and one of the easiest to put right. A colour-matched strip on every end is a small cost for a finish that lasts for years.
Before you start
Read the adhesive instructions, check the room temperature they ask for, and make sure you have everything to hand. Clear the area around the worktop end and protect the floor from dust. With everything ready, each strip takes only a few minutes to fit.
At a glance
- Stone Oak Edging Strip 1.2m
- 1200mm long
- For 30mm and 40mm worktops
- Matches Stone Oak worktops
- Easy DIY fitting
- Protects cut ends
Stone Oak Edging Strip 1.2m questions
How long is it? 1.2 metres (1200mm).
Which worktops does it suit? 30mm and 40mm kitchen worktops, including laminate and wood worktops.
Does it match the worktop? It is made in the Stone Oak decor, to match Stone Oak worktops.
Can I trim it? Yes. Fit it slightly oversize and trim it flush with a fine file or sanding block.
Is it for joints between worktops? No. It covers exposed ends; use a joint strip or mitre for joints.
How many do I need? One per exposed worktop end; one strip can cover two ends of a 600mm deep worktop.
How do I clean the stone oak edging strip 1.2m? Wipe with a soft cloth and warm, mildly soapy water, then dry.
Looking for more like this edging strip? Browse the full Edging Strips collection or the rest of the Kitchen Worktops shop. To learn more, see this overview of edge banding.


There are no reviews yet.